使用AppVeyor和Travis,自动构建和发布 Electrion应用
前言
Electron应用在开发以后,本地运行 build 只能打包相对于的环境。如在 Mac 下运行只能打包 dmg 不能兼顾其他平台。为了解决这个痛点,就有了这篇文章。
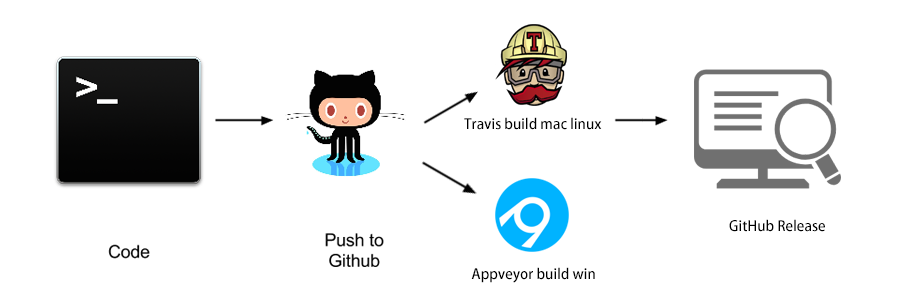
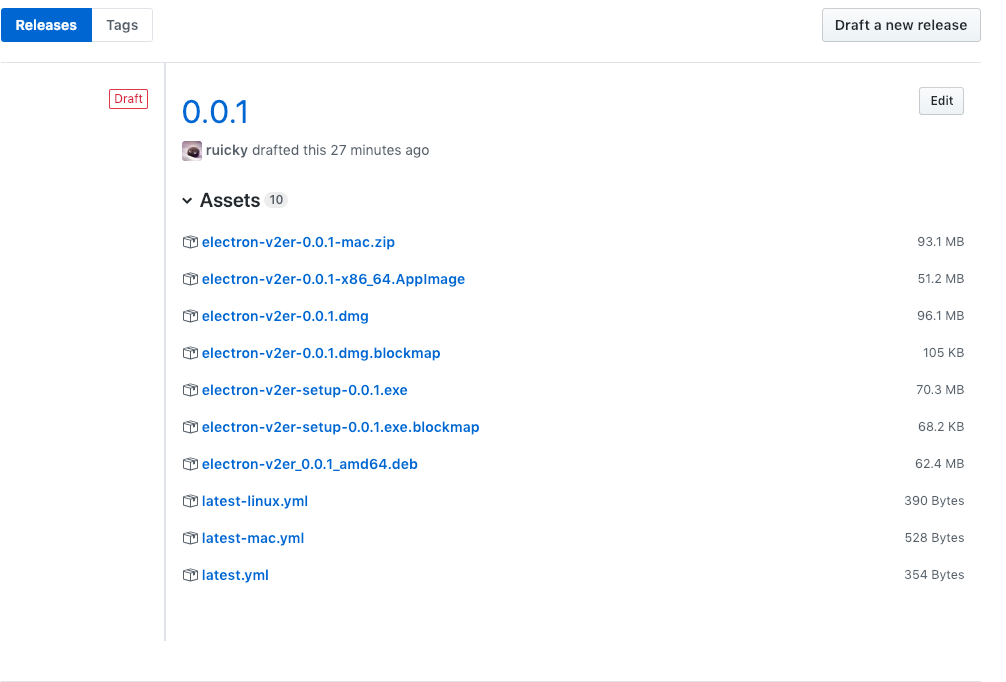
简单说一下构建和发布流程:主要是配置构建工具 electron-builder, 配置 Travis 以构建 Linux 和 Mac 应用,配置 AppVeyor 以构建 Windows 应用,当提交代码到 Github 后,CI 自动拉取代码,运行 electron-builder 相关命令,生成个平台的安装包,并将安装包推送到 Github Releases 中。
在使用 git 提交代码后,CI 自动构建并发布。so easy~ 顺表说一下,对于开源项目,Travis 和 AppVeyor 是能够免费使用的。
准备条件
- GitHub 账户
- AppVeyor 账户
- Travis 账户
- 基于 Electron-vue 脚手架构建的项目(非必须)
- 项目基于 electron-builder 打包(非必须)
配置项目
编辑本地的 package.json
1 | { |
解释:
- 其中的
name(项目名称)version(项目版本)author(作者信息)description(项目描述)license(开源协议) 都需要填写,否则在编译 linux 版本的时候会报错。填写或修改成自己的参数即可。 可参考 Metadata 参数解释 - 在
scripts中的build添加--publish always可参考 How to Publish 里的参数解释
生成 GitHub 的 GH_TOKEN
electron-builder 需要 GH_TOKEN(Github Personal access token) 才有权限上传文件到 Github Releases 中。 可在 Personal access tokens 页面进行生成,由于只会显示一次,注意保存好。在创建的时候 只需要勾选 repo > public_repo 即可。
配置 CI
AppVeyor
在本地项目根目录中添加文件 appveyor.yml,具体可参考一下的示例配置,几乎不用修改。
1 | version: 0.1.{build} |
- 创建项目
- 然后打开 Appveyor 项目页,点击 左边的
NEW PROJECT按钮,然后在选择你要自动化的仓库。
- 然后打开 Appveyor 项目页,点击 左边的
- 设置
- 回到首页选择创建好的项目
- 点击
Settingstab - 在
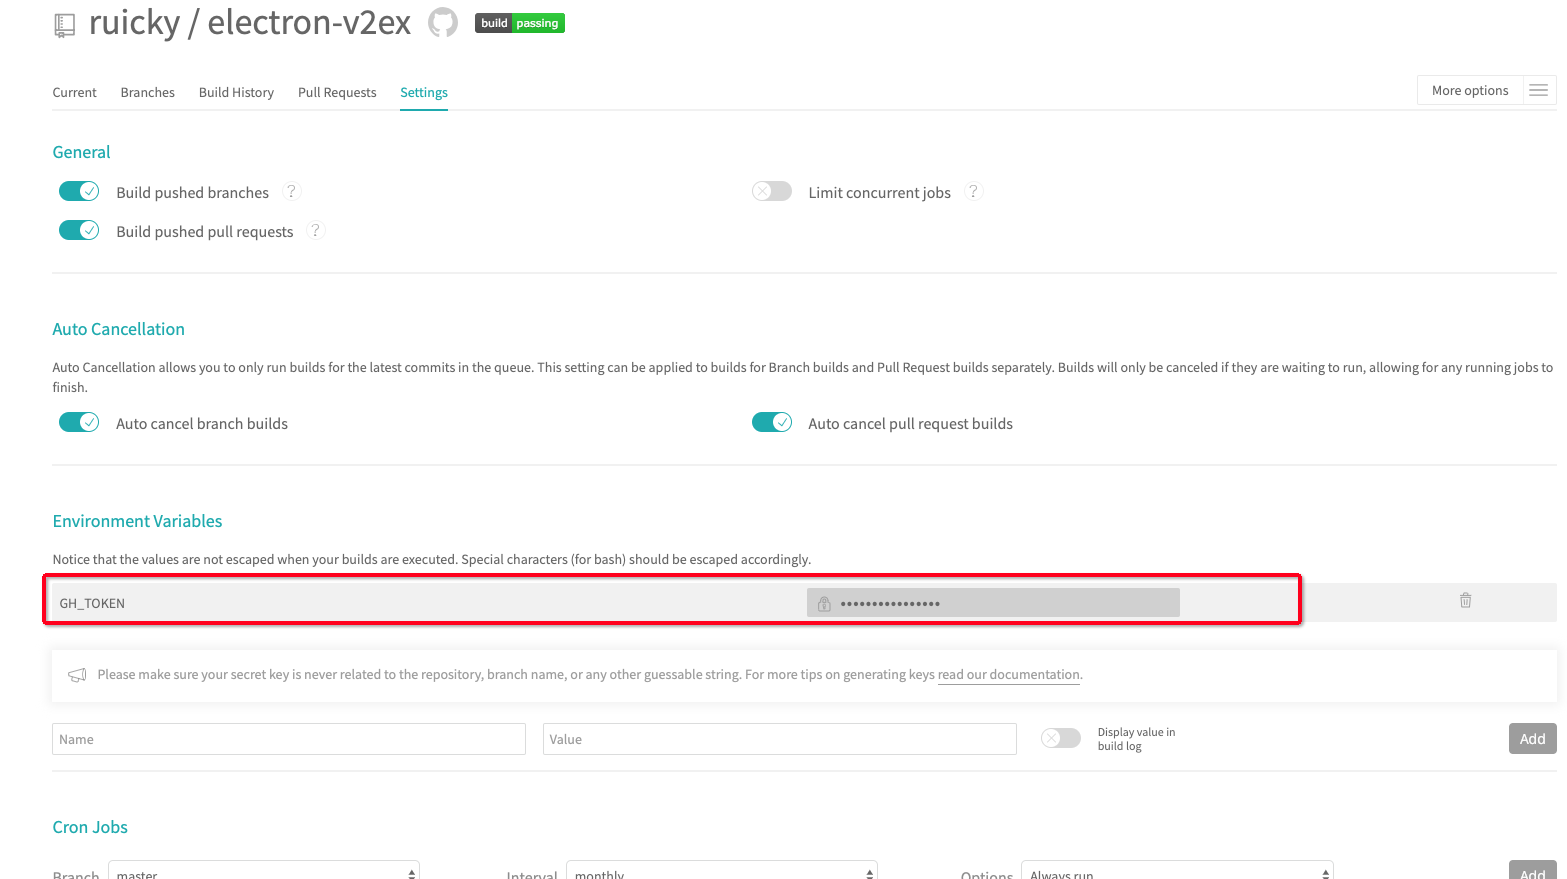
Environment中填写GH_TOKEN的值,点击页面最下面的“保存”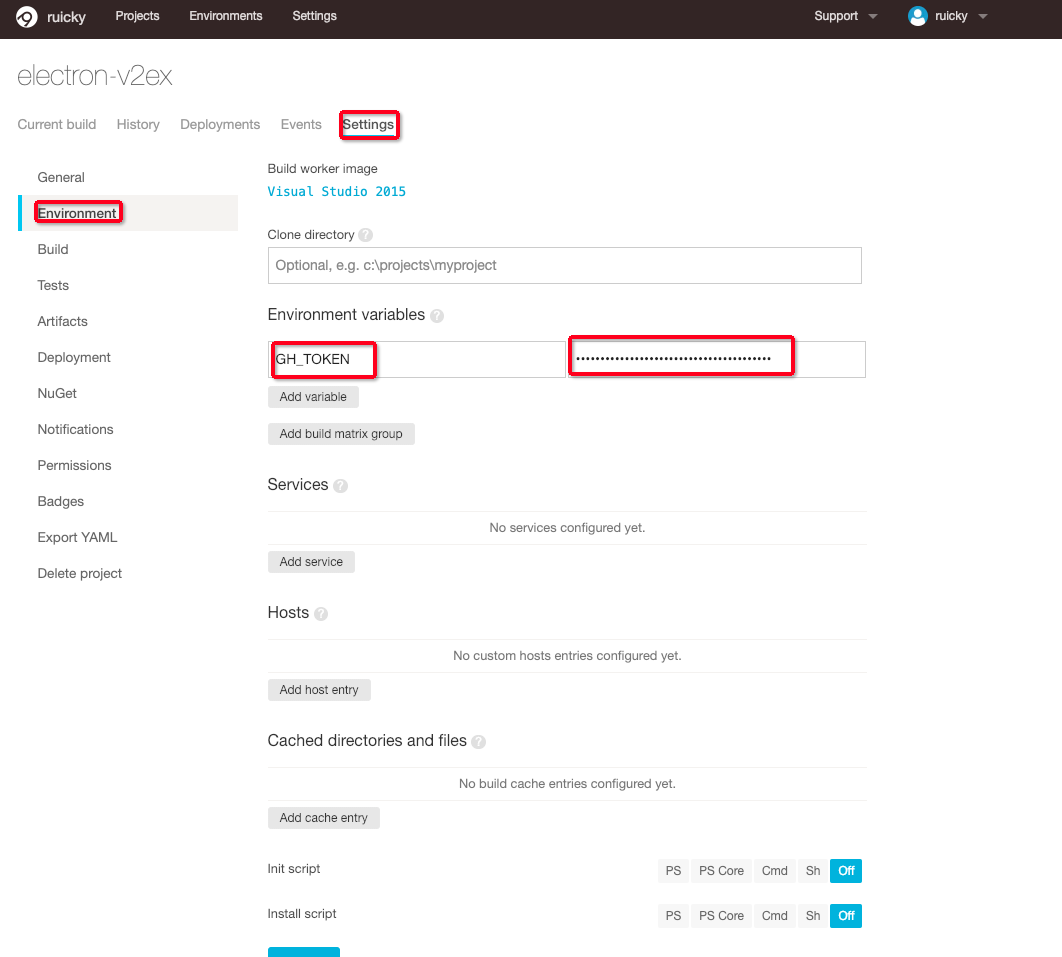
- 在
Deployment中配置部署的结果页,选择GitHub Releases并填写之前生成好的GH_TOKEN,点击页面最下面的“保存”
Travis
在项目的根目录创建文件 .travis.yml 然后参考下面的配置写入,大部分不用修改。
1 | # Commented sections below can be used to run tests on the CI server |
- 进入 travis官网, 点击 GitHub 登录 可自动同步项目到
travis - 选择要 配置的项目
- 选择项目右边的
setting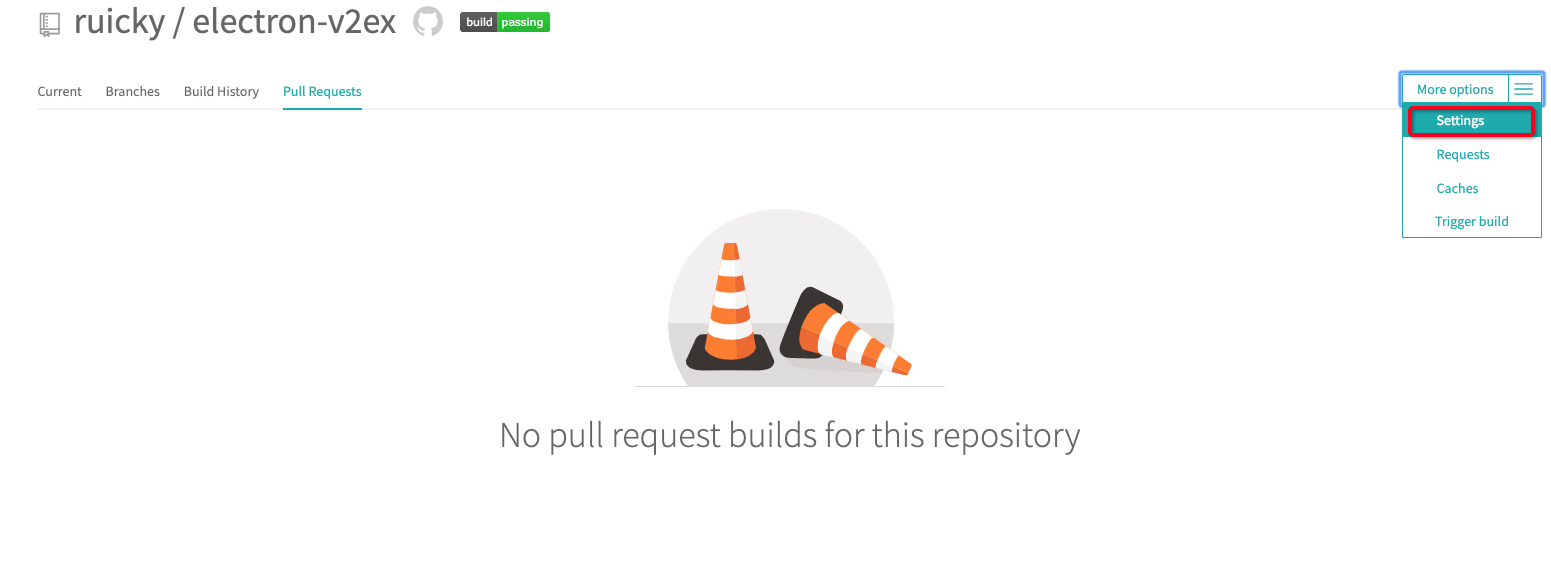
- 填写 GB_TOEN的值
总结
按照上述的配置,就能够自动化的部署了。在配置的过程中由于是 electron-vue 脚手架生成的项目,在 package.json 中有些节点没有,导致在 build linux 环境的时候报错。所以建议,按照上面的说明都配置上。